Animals in the Ocean Evolve into Crabs
In evolutionary biology there’s a concept called “carcinization”. Put simply, there is a trend towards different crustacean species evolving to have crab-like bodies, even if they started out more like a shrimp or lobster. Over time, given the advantages of a crab-like body, they flatten out, tuck their tail, and in just a few million years you have an animal that looks like a crab but started out quite differently.
 These aren’t actually crabs
I’ve observed that the same thing tends to happen with companies’ database infrastructure. No matter where you start out, be it a transactional relational DB or otherwise, the pressures and requirements of scaling for load and organizational complexity inevitably form the resulting system into… DynamoDB. The result might not actually be DynamoDB, but it’ll at least look like it. In fact it will look so much like it that you probably should have just used DynamoDB in the first place.
 *I’d read this*
Databases in a Growing Company Evolve into DynamoDB
What does it look like for database infrastructure to evolve into DynamoDB? Like any evolutionary process, it starts slowly as the pressure builds. Often when your team is just getting started, they reach for the tried and true solution for their database, or at least whatever’s trendy at the moment. Let’s assume it’s PostgreSQL, which is somehow both right now.
The team jams away building their product with little oversight on the different ways the database is being used. And yes, it’s almost always just one database at this point—who wants to maintain multiple databases, after all? As the product grows, so does the database, sprouting new tables, new indexes, and above all getting filled with more and more data.
As the growth continues, there will be warning signs. Queries that used to be lightning fast are getting slower and slower. Even inserts are slowing down as index updates and constraint checking takes longer. Your product experiences more and more outages as the database locks up “randomly”, sometimes because one customer “did too much at once” and it affected everyone else. Sometimes it’s because some developer made a change that had unintended consequences, or updated the schema and locked an entire table. Minor features start having a negative impact on core flows: your chat system gets slower and more fragile because the table of reaction emojis got too large.
 Point to where you are on this chart right now
Most companies respond to this by building out a dedicated “database infrastructure” team. These are the heroes who are tasked with keeping The Database running, and it’s the most brutal on-call rotation in the company. And if that wasn’t bad enough, life gets harder for the rest of the company. Product teams move slower now that their changes have to go through more checks and process gates, but at least outages are somewhat fewer and further between.
The growth doesn’t stop though (which is good for business!) The database infra team starts to raise the alarm: they’re already running on the biggest database instance your cloud provider has to offer. The slider can’t be pulled any further to the right, and no amount of money can buy your way out of the problem. The application has to change.
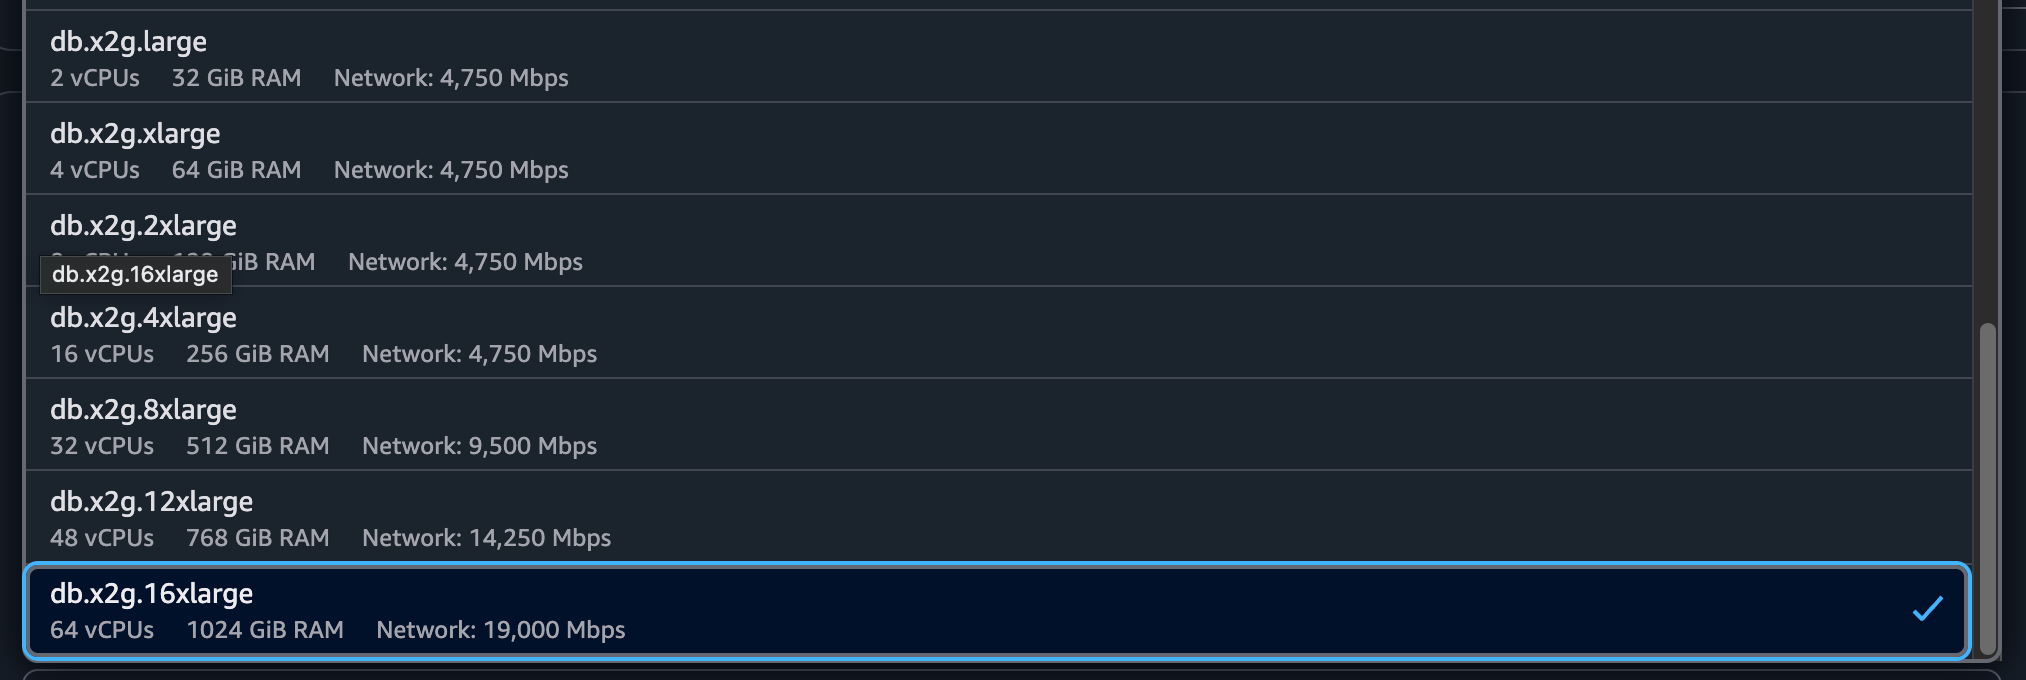 The RDS instance dropdown doesn’t have anything more after this
So if you can’t scale up anymore, what do you do?
Making Headroom
Once a team has exhausted their ability to vertically scale, the options for buying time look pretty much the same for everyone:
- Add caching or read replicas. This can buy headroom on a database that’s getting CPU constrained by bleeding off a lot of the read traffic. The downside is a lot of extra infrastructure to manage. Plus, now you have to deal with either stale data (with an eventually-consistent cache) or slower, more fragile writes (with a strongly consistent read replica). There will be temporary relief in your CPU graph as the traffic reduces, but the database infra team has more to manage, the product has gained a bunch of subtle bugs, and continuous growth will eat up all the gains you made.
- Split out tables into new databases. Does everything need to be in one database? Maybe not, but good luck getting things out of there. This is always difficult because you have to choose what goes and what stays. To do that, you need to know all your queries that involve the tables you want to move, and inevitably you’ll be faced with having to break some of those queries. No matter what it’s going to take a lot of development effort to get the database’s consumers to move over, and product teams will ship less while they’re focused on migrating. What’s worse is that the data that’s hardest to move out of your main database tends to be the most critical data, which is usually the data that’s causing scaling problems in the first place.
- Optimize queries and data storage. Some folks think they can optimize their way out of the problem, and you’ll definitely find some shockingly inefficient queries and bloated tables to get rid of. But these wins are temporary as new inefficient queries and bloated tables keep getting added, and usage keeps going up.
In the end, none of these solve the core problem: you’re trying to contain unbounded growth within a box (server) that cannot grow unbounded. Every company will either hit this point, or stagnate, or die.
Evolving claws and a flat body
There’s only one real option to contain unbounded growth: partition the data itself, and horizontally scale. After a few years of the database infrastructure team furiously patching the dam, they all must come to the conclusion that the only way to continue scaling is to expand the database beyond a single machine. While it’s inevitable, it isn’t easy. Lots of teams will look back at their history and make a critical mistake: “We’ve come this far with our favorite database technology, we can adapt it to be horizontally partitioned.”
The most senior engineers in the database infrastructure team will draw up a plan: each table will be partitioned by some natural key, and that will be used to distribute the data across many machines. Some sort of proxy service will be introduced that takes queries and routes them to the correct partition. Complex systems will be employed to determine how many partitions there are and which one holds a particular key, and those systems will grow more complex to handle adding new partitions over time. You’ve heard this story before, because it happens all the time.
 More or less this, every time
There will inevitably be casualties switching over to this new proxy. SQL is a very complex language that can join between many different tables that could each have a different partitioning strategy. Most of the teams building these proxies will not want to sign up for the task of building a general-purpose query planner, so they’ll restrict the kind of queries it accepts to be a small subset of queries that include the partition key in them.
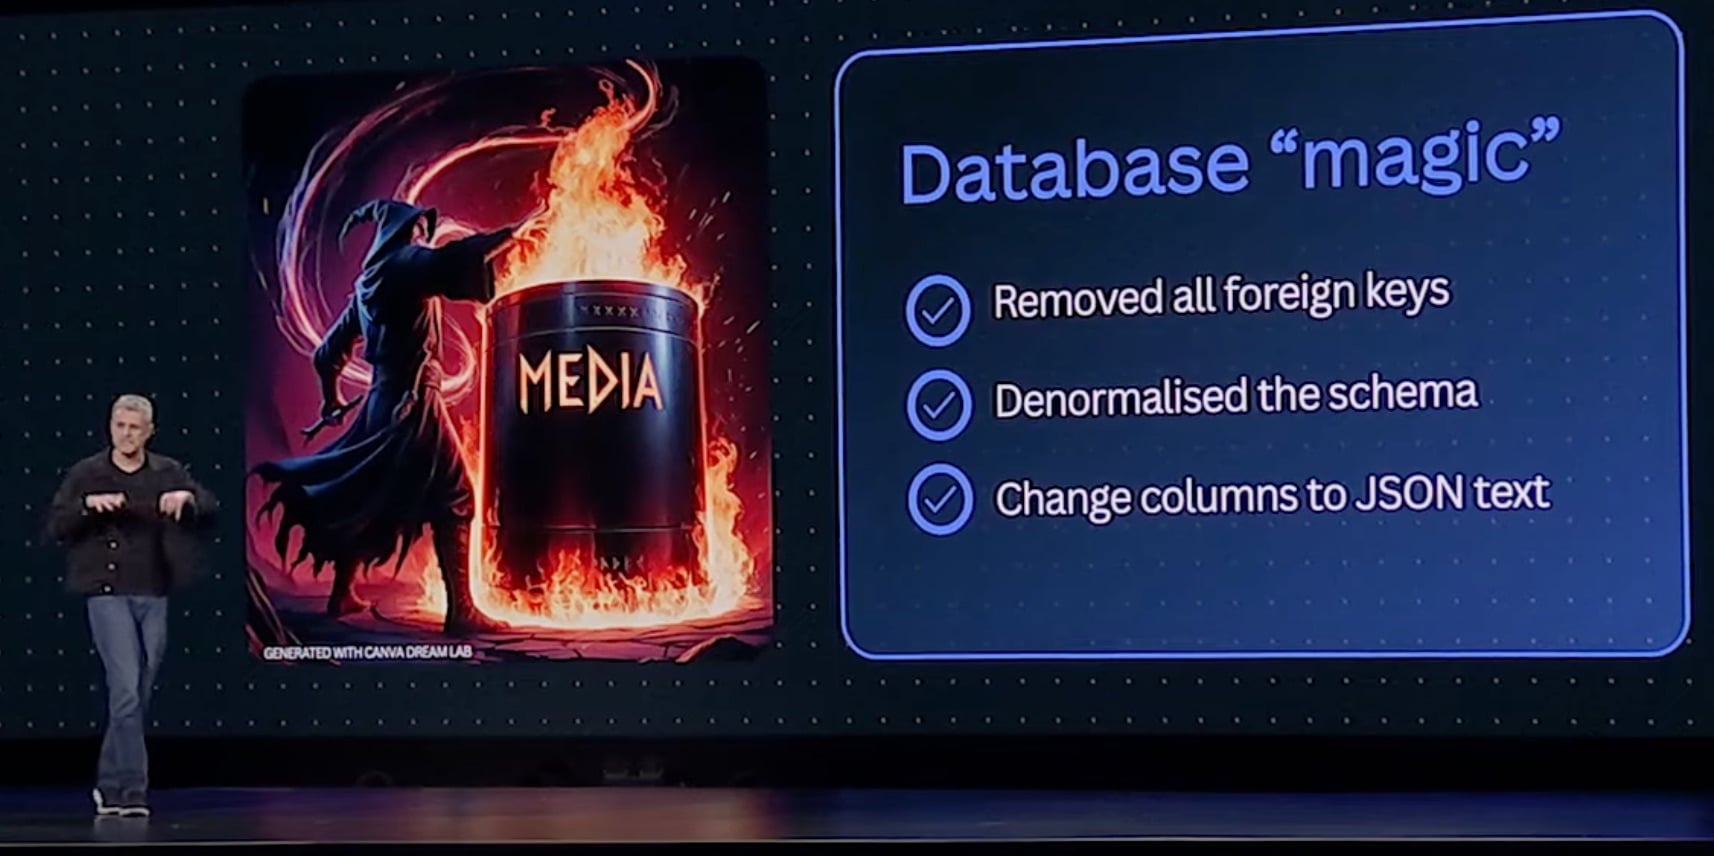
Other things get far more difficult in this partitioned world. Transactions between partitions are right out. Updates to schemas are now so difficult that they are generally avoided, since they need to be coordinated across all partitions. The lack of ability to change schema, plus the reduced query capabilities from the proxy layer, leads teams to drastically simplify their schema. Usually they end up with tables that look like a partition key, a couple secondary ordering keys, and a big JSON blob of data.
What does that sound like?
What the team has built is:
- An inherently partitioned database, with records automatically spread across machines, and the ability to add new partitions as you scale up.
- A vastly simplified query system that only really works on a single partition key at a time.
- Storage for generic JSON documents instead of strict schemas in column-oriented tables.
- Limited support for transactions if they have them at all.
And what they’ve gained is:
- The ability to scale infinitely by continuing to add more partitions.
- Consistent performance regardless of how much data is stored and how many queries are served, assuming partition size is kept constant.
That’s a pretty good description of DynamoDB! Of course, in our story the team has painstakingly arrived at this point by themselves, and now have complex infrastructure to develop and maintain on their own, while DynamoDB is a hosted AWS service with zero operational overhead (it’s all AWS’ job to run it). At least they get to write a cool blog post about it.
This pattern is far from exclusive to DynamoDB. Others like Cassandra, FoundationDB or ScyllaDB are very similar. But none of them are run by a huge cloud provider on your behalf.
It has happened before, and it will happen again
None of this is theoretical. It’s a pattern we’ve observed happening over and over again at growing companies. When we worked at Amazon, we were part of the teams that went through the first steps of this story, trying to keep a couple huge Oracle databases alive until DynamoDB was invented and all Tier 1 services were migrated away from relational DBs. Facebook went through the same story with MySQL. YouTube famously built Vitess to partition MySQL. Even younger companies like Figma, Canva, and Notion have gone through similar journeys.
 Canva migrated from RDS to DynamoDB via the same process we talked about here
People who have lived through this tend to favor DynamoDB or its look-alikes when starting new projects, and they advocate for it whenever things start to get hairy. If you haven’t gotten to experience this first-hand, maybe ask yourself whether or not you expect your product to keep growing, and if you do, whether you can see your team going down the same path as so many others. And maybe you’ll reach for something that can keep up with that growth.
This was originally published on the Stately Cloud blog on July 19, 2025: Sea creatures evolve into crabs, databases evolve into DynamoDB.